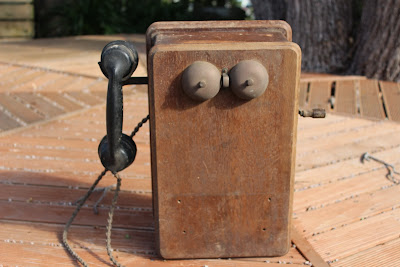
When my parents moved from the family home into a smaller place they
had a massive cleansing of old stuff that had been around for years. I
picked up a couple of old wooden wall phones that had been gathering
dust. These had been used on the farm for communication between the farm
and the house. I thought they would make a great restoration project.
The first one I went to work on is in the worst condition,a British
Ericsson N2510D, introduced around 1932.Check out
this link for more information on this particular model. Here are some photos of the phone as it was prior to restoring:
 |
| The battery box has battery acid staining visible in the bottom of the photo. |
 |
| Bell Ringer mechanism. Wires only barely still intact! |
 |
| These are meant to be shiny brass! |
 |
| N2510D designation stamped on the back. |
I completely stripped the phone out and disassembled the timber, stripping the varnish with paint stripper and refinishing with a satin varnish. The biggest issue with this particular phone was the bad case of borer in the base of the outer case. The wood was pretty much destroyed by the little buggers. The holes are too small for putty to work effectively so I ended up filling the holes and damage with fine oak sawdust and setting this with super glue. Even still the results aren't perfect and the colour isn't quite right, but it's on the base and essentially unseen so I'm OK with it.
 |
| Magneto and Coil Assemblies. |
This is the base after taking the sides and door off. All of the metal components had quite bad rust spots and damaged paint. Pretty much any screw that didn't have proper plating was rusted away to nothing. The magneto visible in this picture would require stripping back to bare metal and recoating somehow. More on that later. I took quite a few reference photos during disassembly as I was sure I would forget where some of the wire connections went during reassembly. I was right!
 |
| Magneto Assembly. Lots of pitting and surface rust! |
There is 70 years of gunk built up inside. The magneto barely turns and the copper internals are brown with crud. Time to strip it all to base components and give it all a nice hot soapy bath!
After a really good clean and allowing several days of drying on the fireplace hearth, I reassembled the magneto, minus the magnets which still required painting, and checked that it all still worked!
 |
| Finished Magneto. Just waiting on the magnets to dry! |
In this view you can see the two small oil(?) receptacles at each end. This keeps the bearing system lubricated. Not sure what oil to use for this, but probably 3-in-1 or similar I guess.
 |
| Finished Magneto. Note the oil reservoirs. |
The bells all cleaned and polished. Each bell is a slightly different thickness, giving them each a different tone when struck. Clever! They appear to be slightly different grades of brass so I am having a devil of a time getting them to have the same level of polish. Hmmm.
 |
| Bells polished. Note the different patina. |
The start of reassembly. The image below is of the rear panel without the box sides attached, and the cleaned coil has been screwed back down with the original nickel-plated screws.
 |
| Cleaned Coil fitted back to rear panel. |
All of the metal components that were painted black were quite pitted and scratched so they needed cleaning and sanding right back to bare metal. There was a lot of black painted brass items used in these phones, so I ended up etch priming them and then used rattle can satin black to try and achieve the same look of the original paint. Initially the top coat was Hammerite satin black, but for some reason it just ran like water off the etch primer and did not set at all! No idea why. The paint supplier couldn't explain it either. So I had to strip it all back again and start all over. The end result, using a satin black from the same brand as the etch primer, came out pretty good. They components won't be as robust as the originals, but then I don't imagine the parts will get knocked around much once it is on display!
 |
| Etch Primer coat applied. |


No comments:
Post a Comment